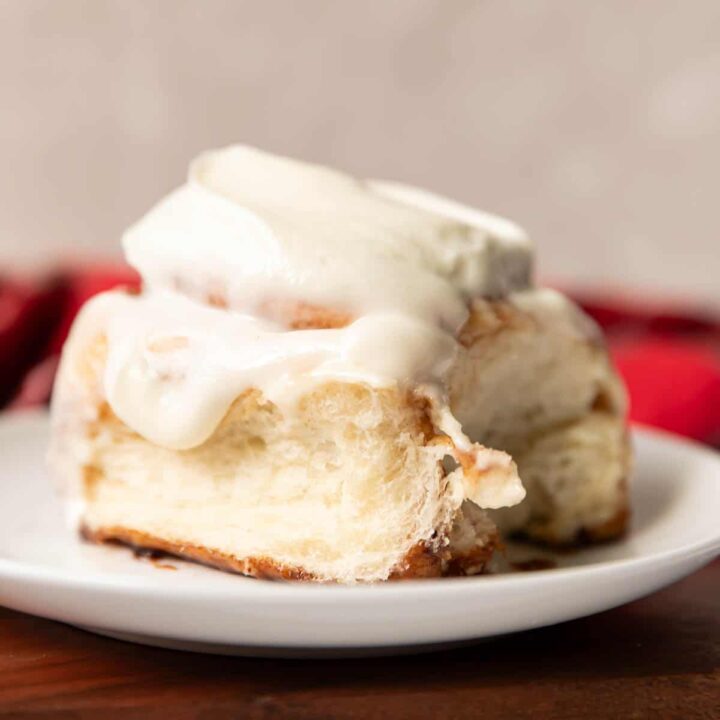
These are the most delicious, absolute fluffiest cinnamon rolls you'll ever have! They have a pillowy texture with swirls of cinnamon and are topped with cream cheese frosting. With a few special tips and tricks, you'll be a master of baking cinnamon rolls in no time.
Looking for more dessert recipes? Try my pumpkin cinnamon rolls, pecan sticky buns, coffee cake with streusel topping or peanut butter blossoms.
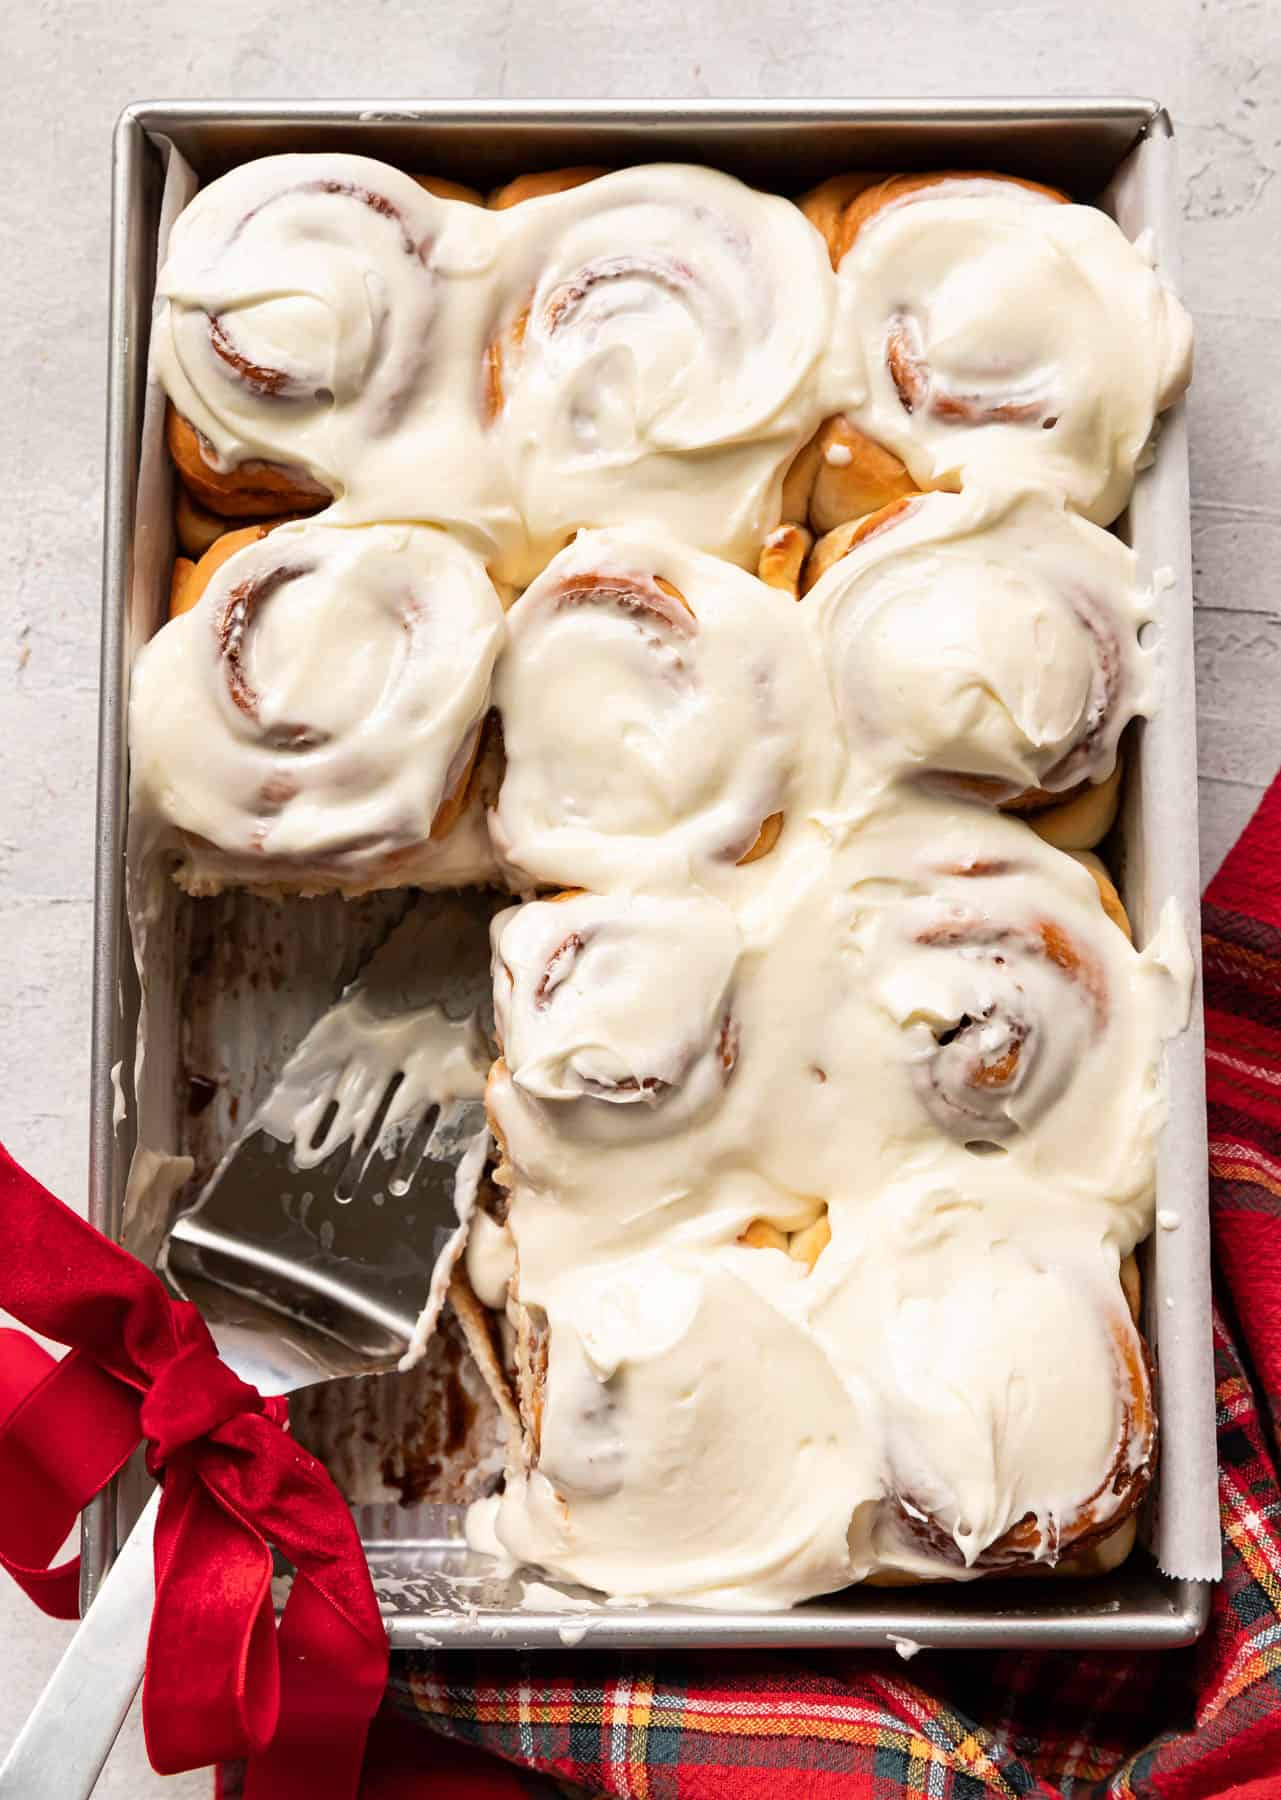
I don't know about you but I feel like I've always chased that perfect, bakery quality cinnamon roll. Well I have a treat for you today, we're making the absolute irresistible, perfect, fluffy cinnamon rolls. I think they are better than a bakery.
When I think of the perfect bakery style cinnamon roll it has a few qualities.
First being that it's extra soft, extra fluffy, extra poofy and not dry at all. Second, it has to have the perfect cinnamon ratio, you want to taste the cinnamon but not be overpowering. Third and last, the frosting has to be a tangy cream cheese frosting to balance out the sweetness of the brown sugar filling.
Okay so check, check, check! You'll never need another cinnamon roll recipe.
Jump to:
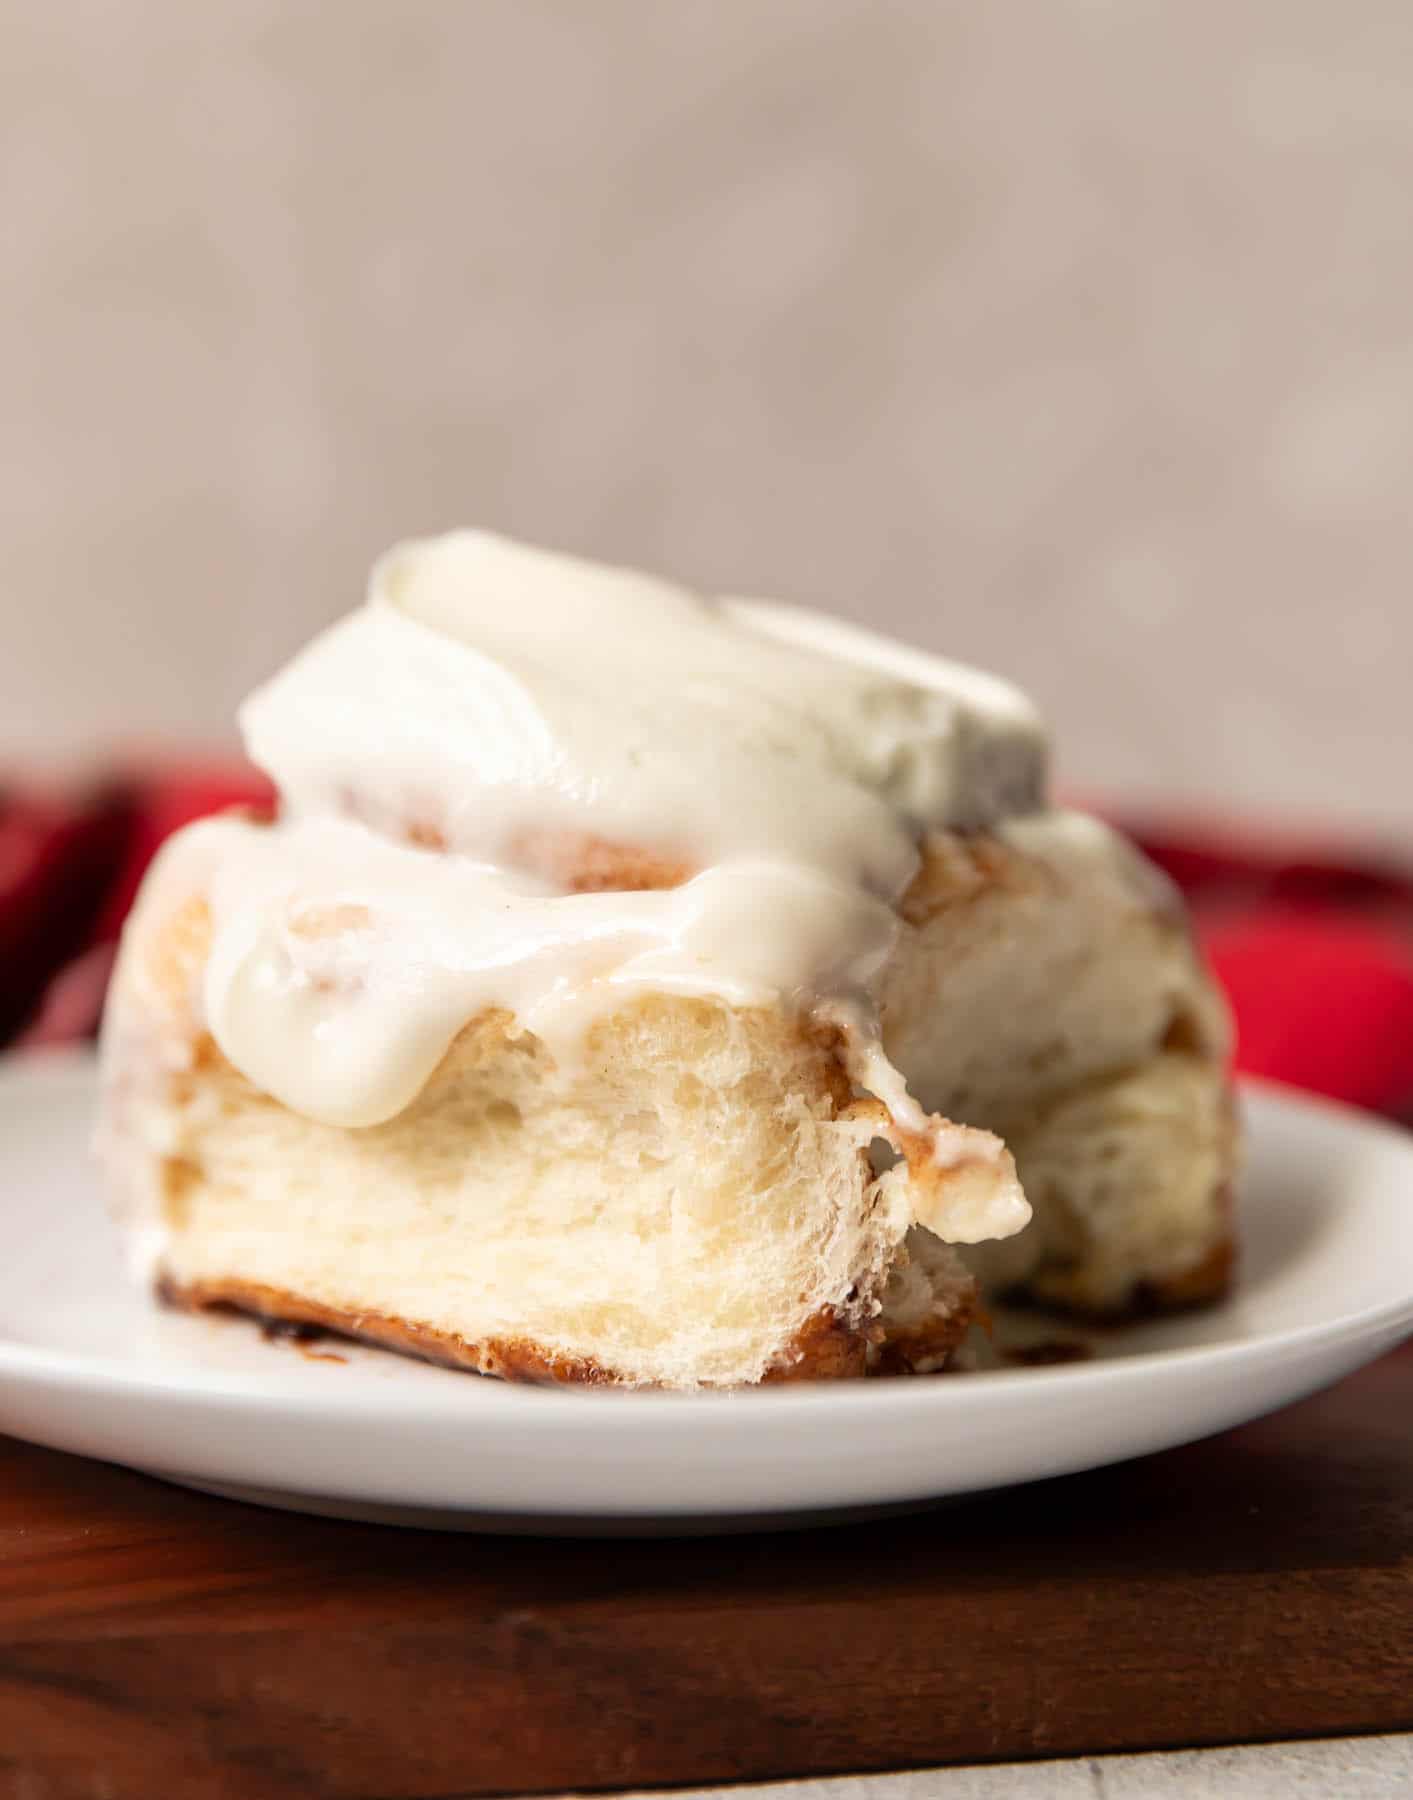
Tips and Tricks
Bread Flour: Using bread flour is a serious game changer. If you are trying to use all purpose then stop what you're doing, run to the grocery store and get a bag of bread flour.
Don't even think about swapping this out for all purpose. If you want to use all purpose try this recipe for overnight cinnamon rolls.
This recipe for fluffy cinnamon rolls uses bread flour only.
The Roux: It sounds a little weird but before you knead all the ingredients together you are going to make a roux with some of the flour and milk. The process is actually called tangzhong and is an Asian technique of cooking flour and a liquid together to make a paste (or a thick roux). It helps to hold moisture. This also helps your cinnamon rolls from going stale.
Metal Baking Pan: For even baking and the best texture, cinnamon rolls should be baked in a metal pan.
Whole Milk: Opt for whole milk when making this recipe. Whole milk has more fat.
Instant Yeast: For this recipe I used instant yeast instead of active. When you use active yeast you have to get the temperature of whatever you are using to proof it just right. By using instant yeast you take all the guess work out of it. As long as your instant yeast isn't old it should work.
Kneading: These super fluffy cinnamon rolls knead for almost 20 minutes on a lower speed. Kneading for a longer time at a lower speed is good because it allows the gluten to develop gradually. This gives you nice soft dough.
Proofing: It's important to not OVERproof the dough. Proofing is the time you give the dough to rise. If you let it proof too long then there is too much gas buildup in the dough. This will yield denser cinnamon rolls.
- First Rise - The first rise should allow the dough to double in size. No more. This could take 45 minutes or this could take 90 minutes. It depends on how warm your kitchen is. Don't let your dough continue to proof after it has doubled (have you ever let it spill over the edges? guilty!).
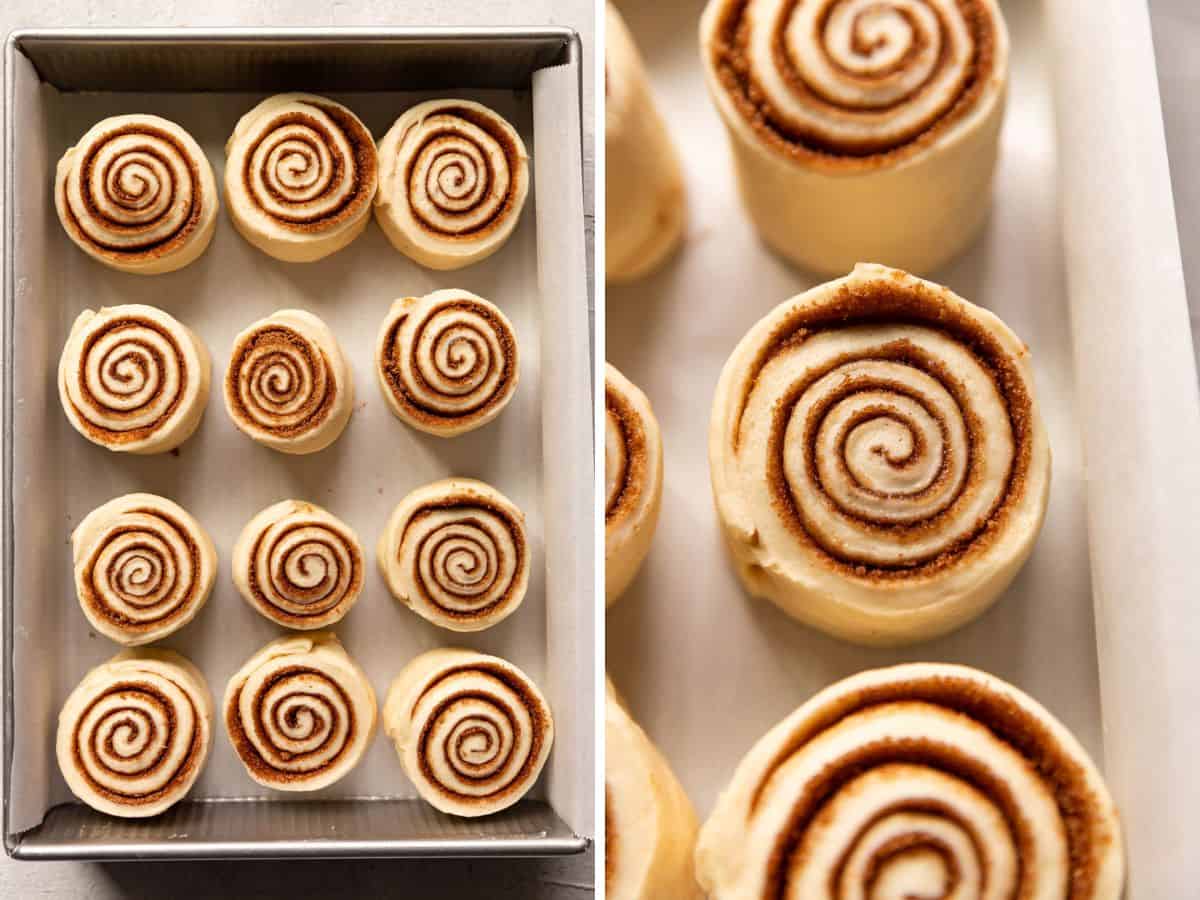
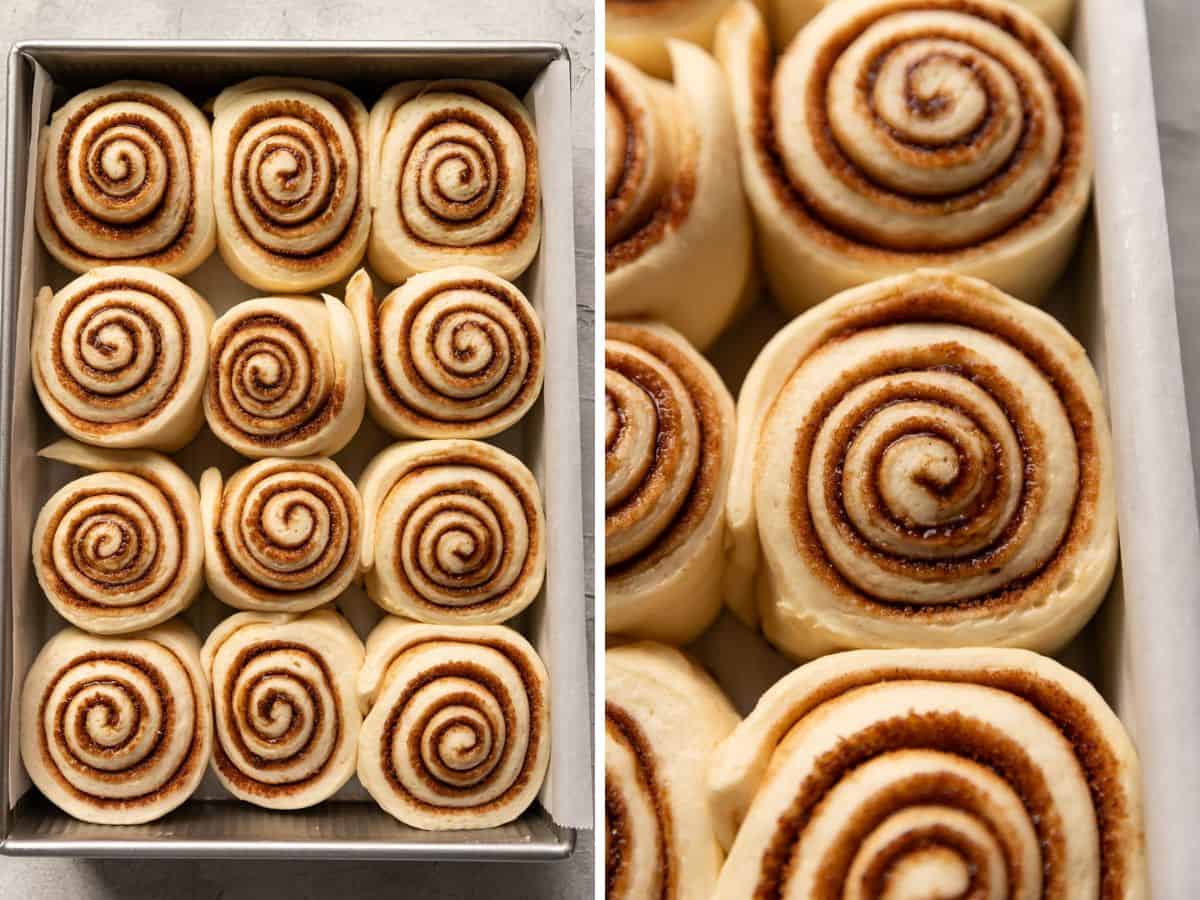
- Second Rise - This is the rise where you've already formed your cinnamon rolls and they are now in the baking pan. This rise only needs to be 30-40 minutes. Appearance wise your goal is to have them be puffier than when you started and you are looking for the diamonds. It's where the rolls are now touching but the gaps aren't completely filled. Instead, those gaps look like a diamond shape.
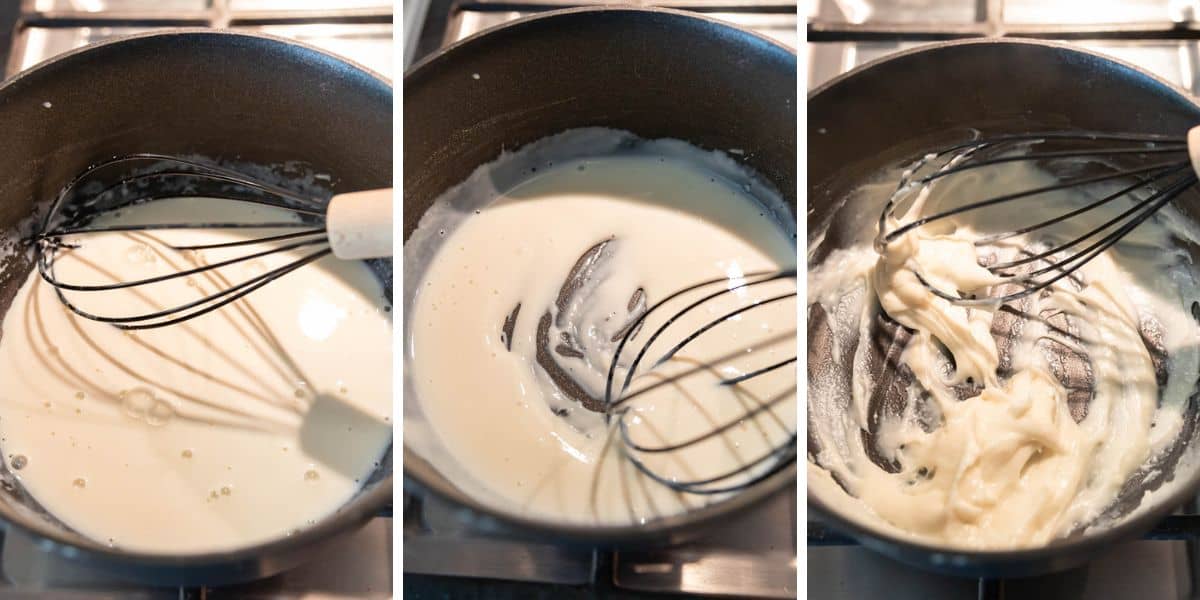
The Roux (tangzhong)
The roux is such an important part of achieving the fluffiest cinnamon rolls. Trust me, don't try skipping this. It takes less than 5 minutes.
All you do is whisk the milk and flour together on low heat until it forms into a thick roux, a paste like consitency.
In the far left photo it's just starting out but in the far right photo it's reached the perfect consistency.
Let it cool a few minutes before using it.
Kneading The Dough
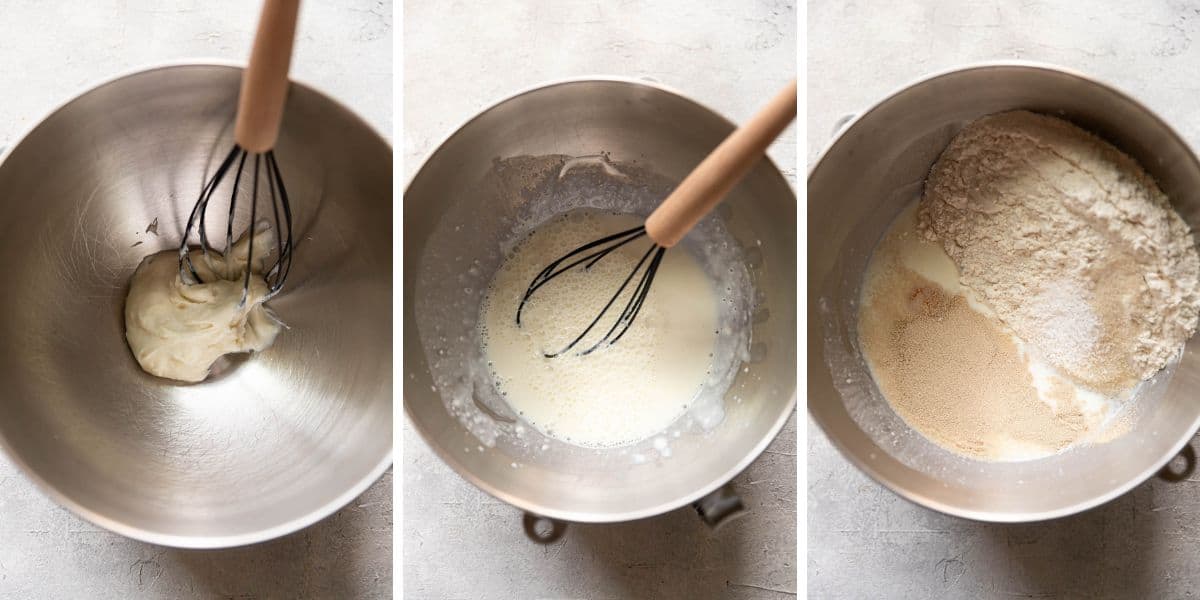
After the roux has cooled just a bit whisk it with the rest of the milk in your stand mixer bowl.
Add the rest of the ingredients, in no particular order to the bowl and then roughly mix it together with a dough hook.
Next you add the soft butter and mix until the butter looks like it's been pretty well incorporated.
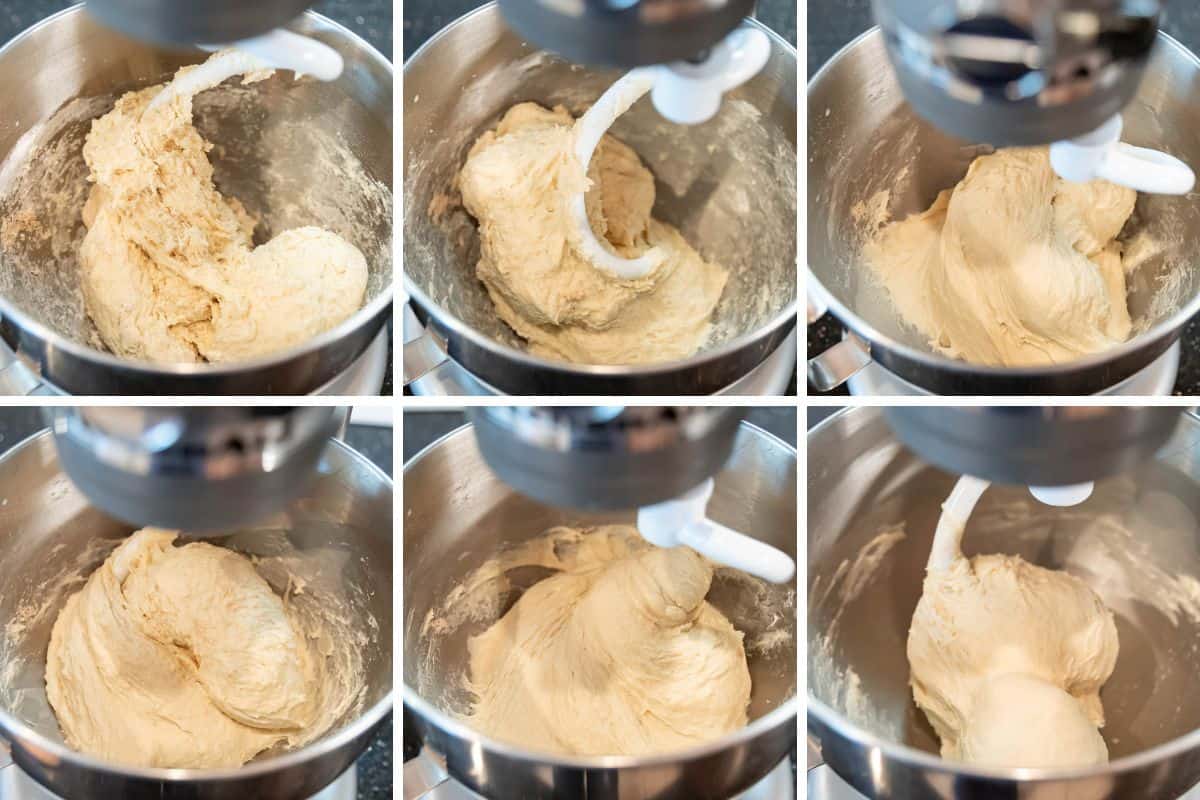
At this point set the mixer to low (speed 2 on a kitchenaid) and knead for 12 minutes. After that increase the speed (speed 4) and knead for 6 minutes.
You'll want to scrape down the sides every few minutes during the whole kneading process.
Overall you are looking for a very soft but not sticky (when poked) dough. It should look very smooth. It should not feel hard and very resilient when poked.
- In the photo below you can see what the dough looks like after the first rough mix of the ingredients. And as time goes on increasing the speed and kneading time it starts to come together. It becomes less tacky, more smooth and holds shape better.
The dough is ready when you poke it and your finger isn't left with sticky dough. If it's still doing this then continue to knead on speed 4 a few minutes at a time until it's no longer clinging to your finger. It should be smooth and slightly resilient. It's okay if it sticks just a tiny bit.
The First Proof
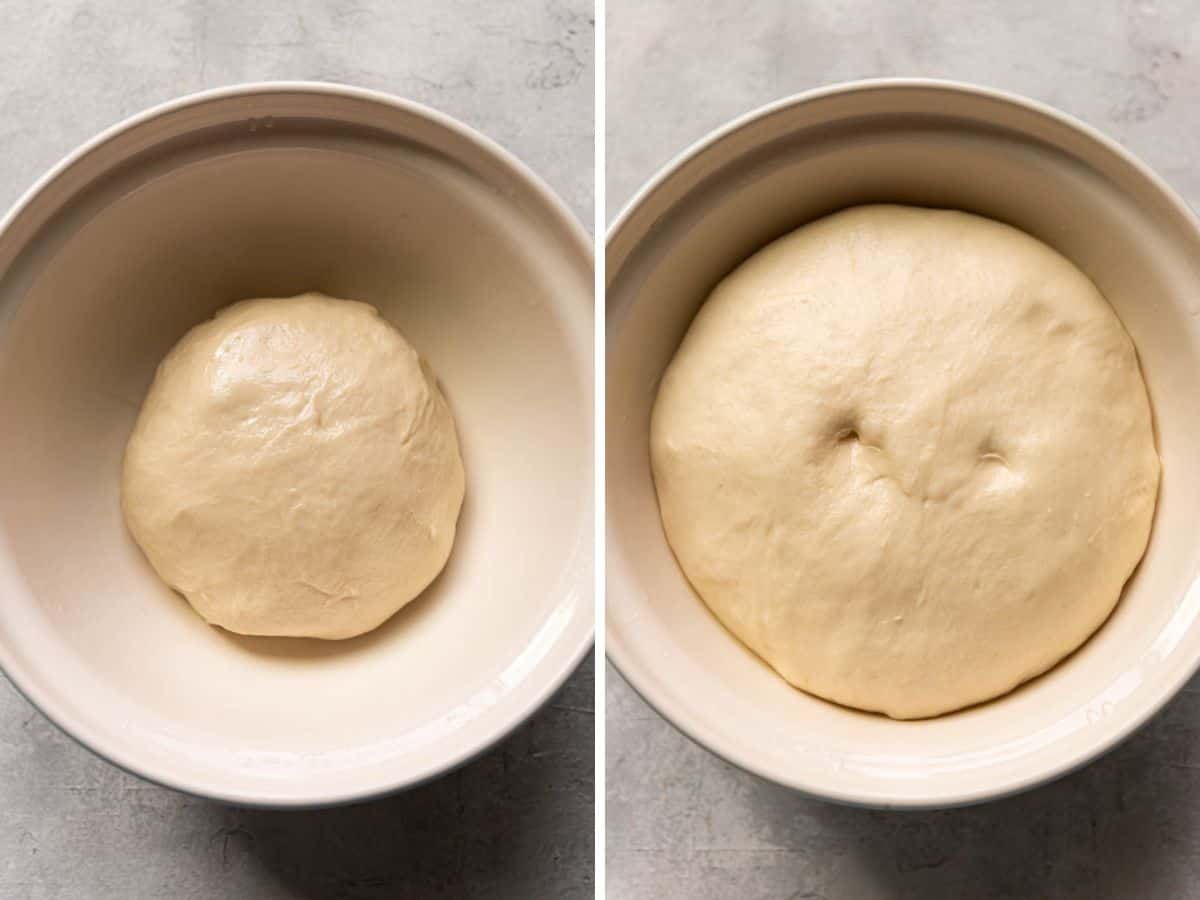
There are two proofs. The first is this one, the dough must double in size as it proofs in the bowl. This helps the gluten to develop.
Grease a large bowl with butter or oil. Form your dough into a tight ball, into the bowl it goes, cover with plastic wrap and let it proof.
Do not let your dough rise TOO MUCH. If you do this it will affect your cinnamon rolls negatively, they will not be as soft and will be dense and dry. The dough only needs to double in size.
Shaping The Cinnamon Rolls
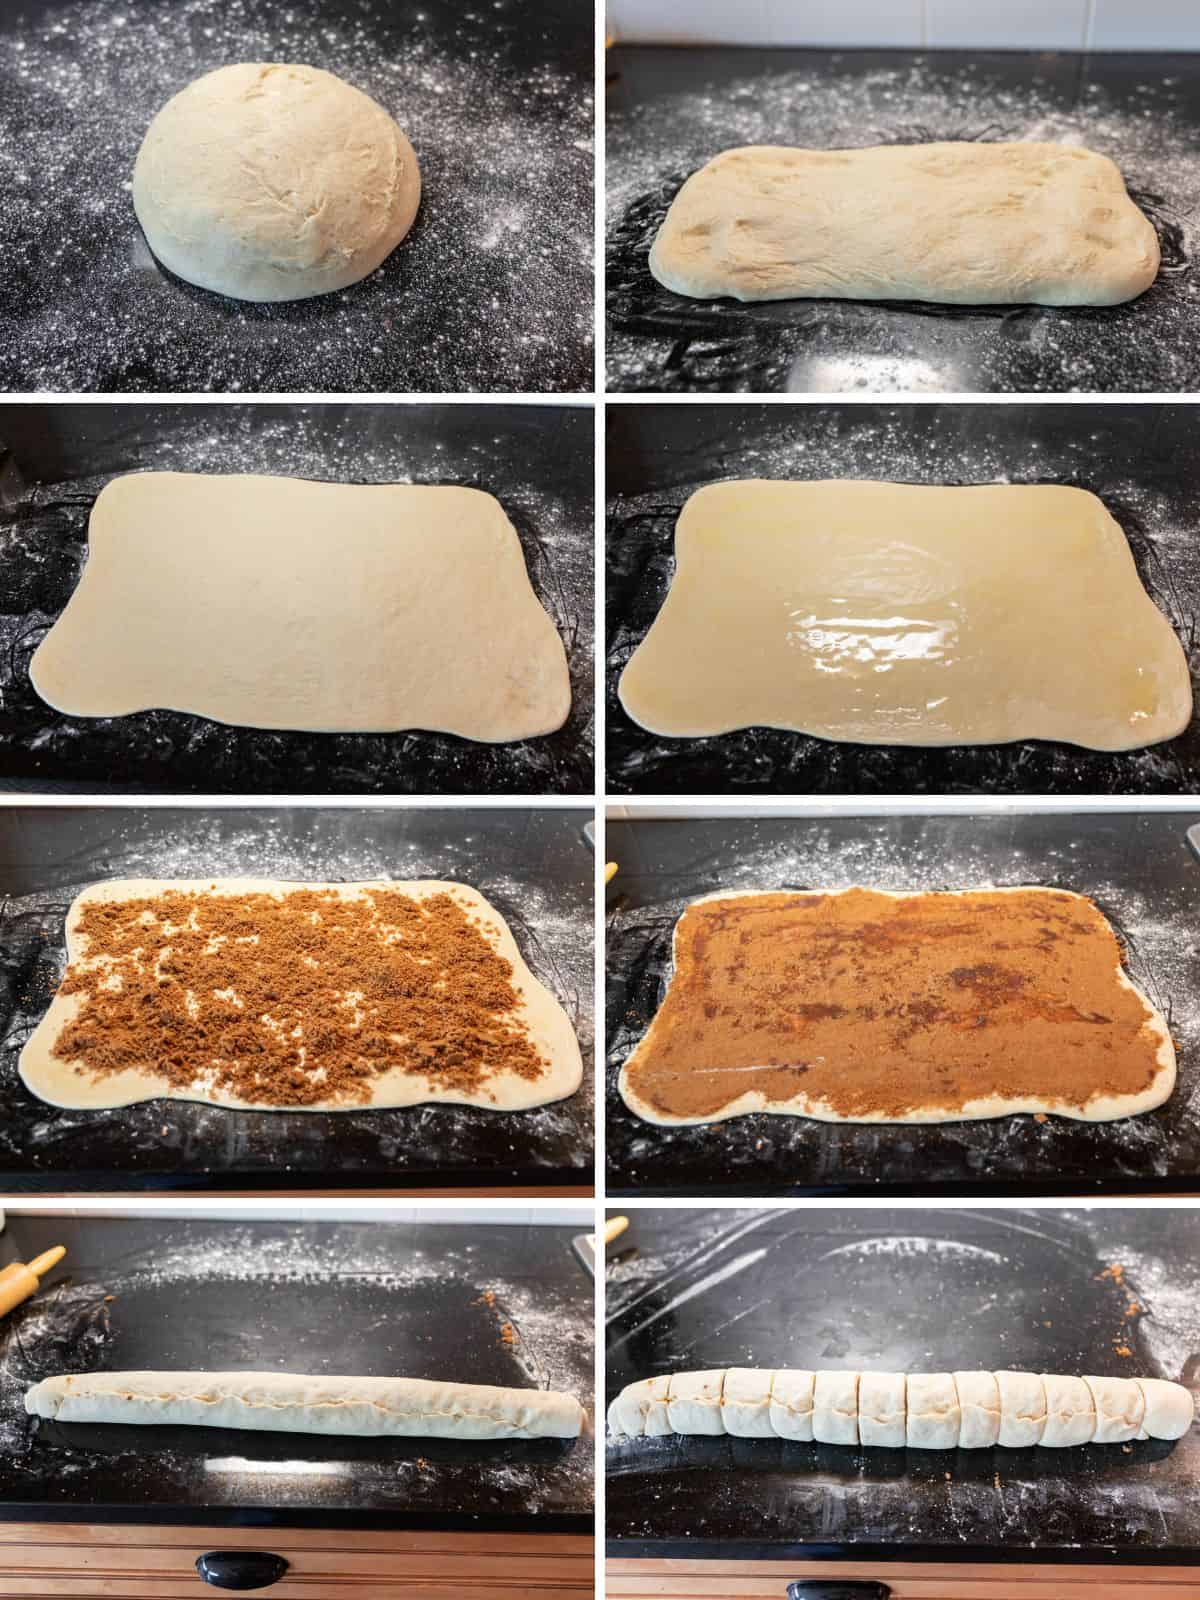
Start with a floured surface so the dough does not stick. Use a rolling pin to roll the dough out with an even thickness.
Trying to make a rectangle out of a circular ball of dough is always tricky.
Have you ever? Have you rolled your dough out and the edges are always the thinnest? To avoid this as you roll, roll from the middle. Then (if you've floured your surface good enough) lift up all the dough and move it around with your hands to stretch it a bit from the center. This takes out all that middle area bulk.
Instead of rolling the corners with the rolling pin, use your fingers to shape the edges and then follow it up with the rolling pin to roll the rest of the dough.
Spread the melted butter all over followed up with the brown sugar and cinnamon. If you love cinnamon then feel free to add extra.
Roll into a tight log and pinch the edges.
My absolute favorite way to cut cinnamon rolls is using sewing thread.
It creates the cleanest, nicest cinnamon roll lines. Make sure you've got adequate flour on the counter as you slide the thread underneath the dough. That way it won't stick.
The Second Proof
The second proof happens in the baking pan. It's about a 30-40 minute rise.
Arranging the cinnamon rolls: I have a great tip when arrange cinnamon rolls. Start at the very ends of your cut cinnamon roll log and the outermost pieces (usually these are the smallest) go in the center of the baking pan. End with the largest pieces (center of the cinnamon roll log) placed in the corners of the baking pan.
- Reasoning - The corners of the baking pan will cook the hottest and most territory (two cinnamon roll sides are getting direct heat). The middle of the baking pan tends to cook less, so the smallest pieces should go in the center. If you were to put your largest pieces in the center of the baking pan they may be undercooked and doughy.
Grease a piece of parchment paper with butter. Use it to line a 9x13 metal baking pan. Place the cinnamon rolls evenly spaced in the pan. Cover with plastic wrap for the second proof.
The Diamond: A clue to know if your cinnamon rolls have risen enough in the second rise is to look for the diamond shape in the gaps between them. If you look at the second photo you can visibly see a diamond shape. They are ready to bake!
- This works when you use a 9x13" pan. If you switch to something bigger than this technique doesn't work. If that's the case then stick to the 30-40 minute rise.
Baking
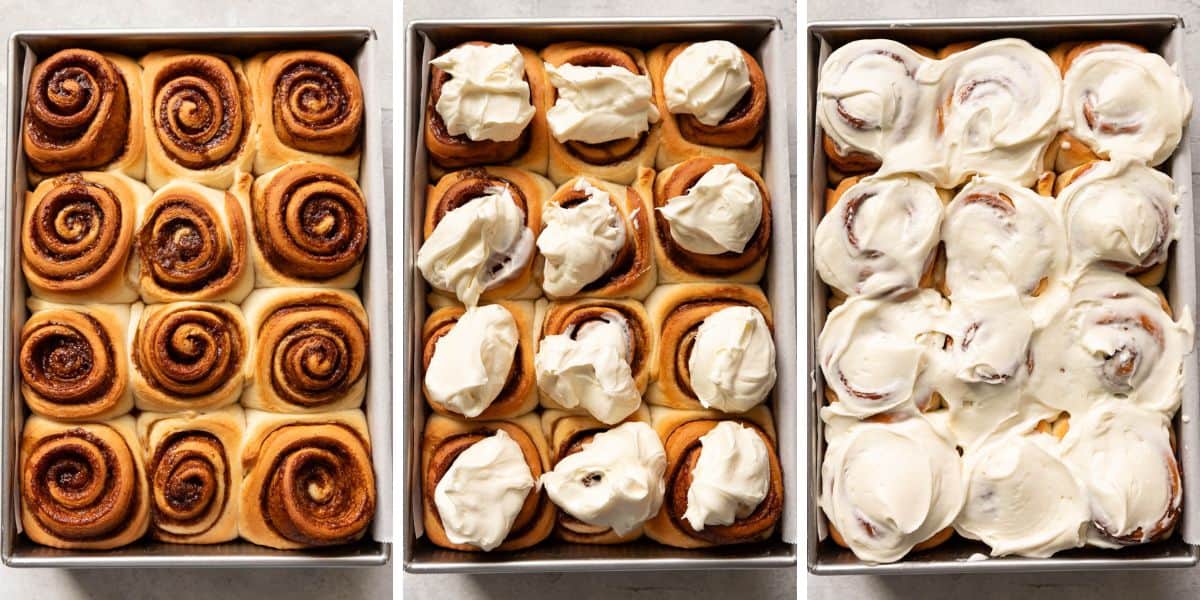
These cinnamon rolls bake for 25 minutes at 350 degrees. Ovens can vary in heat so you may find that you need to bake yours slightly less, or longer. You are looking for golden tops.
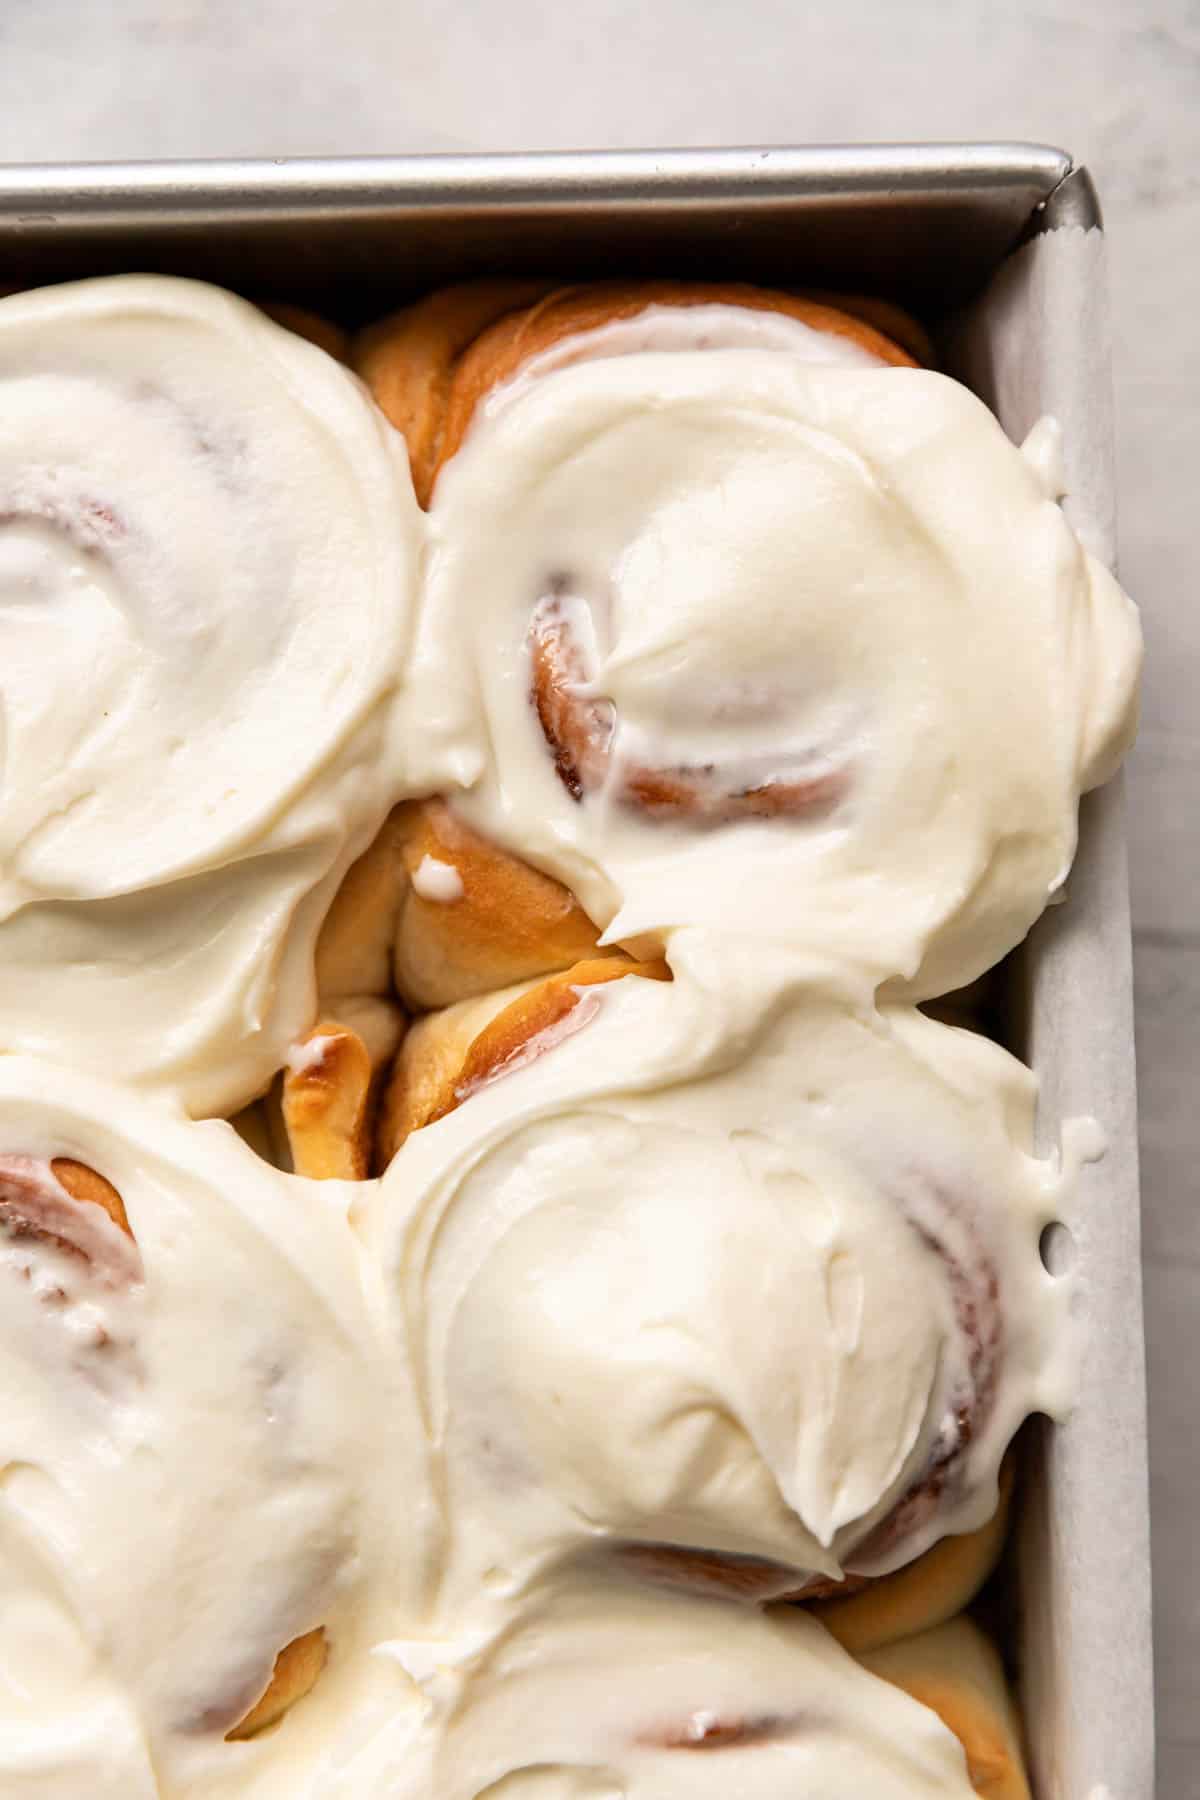
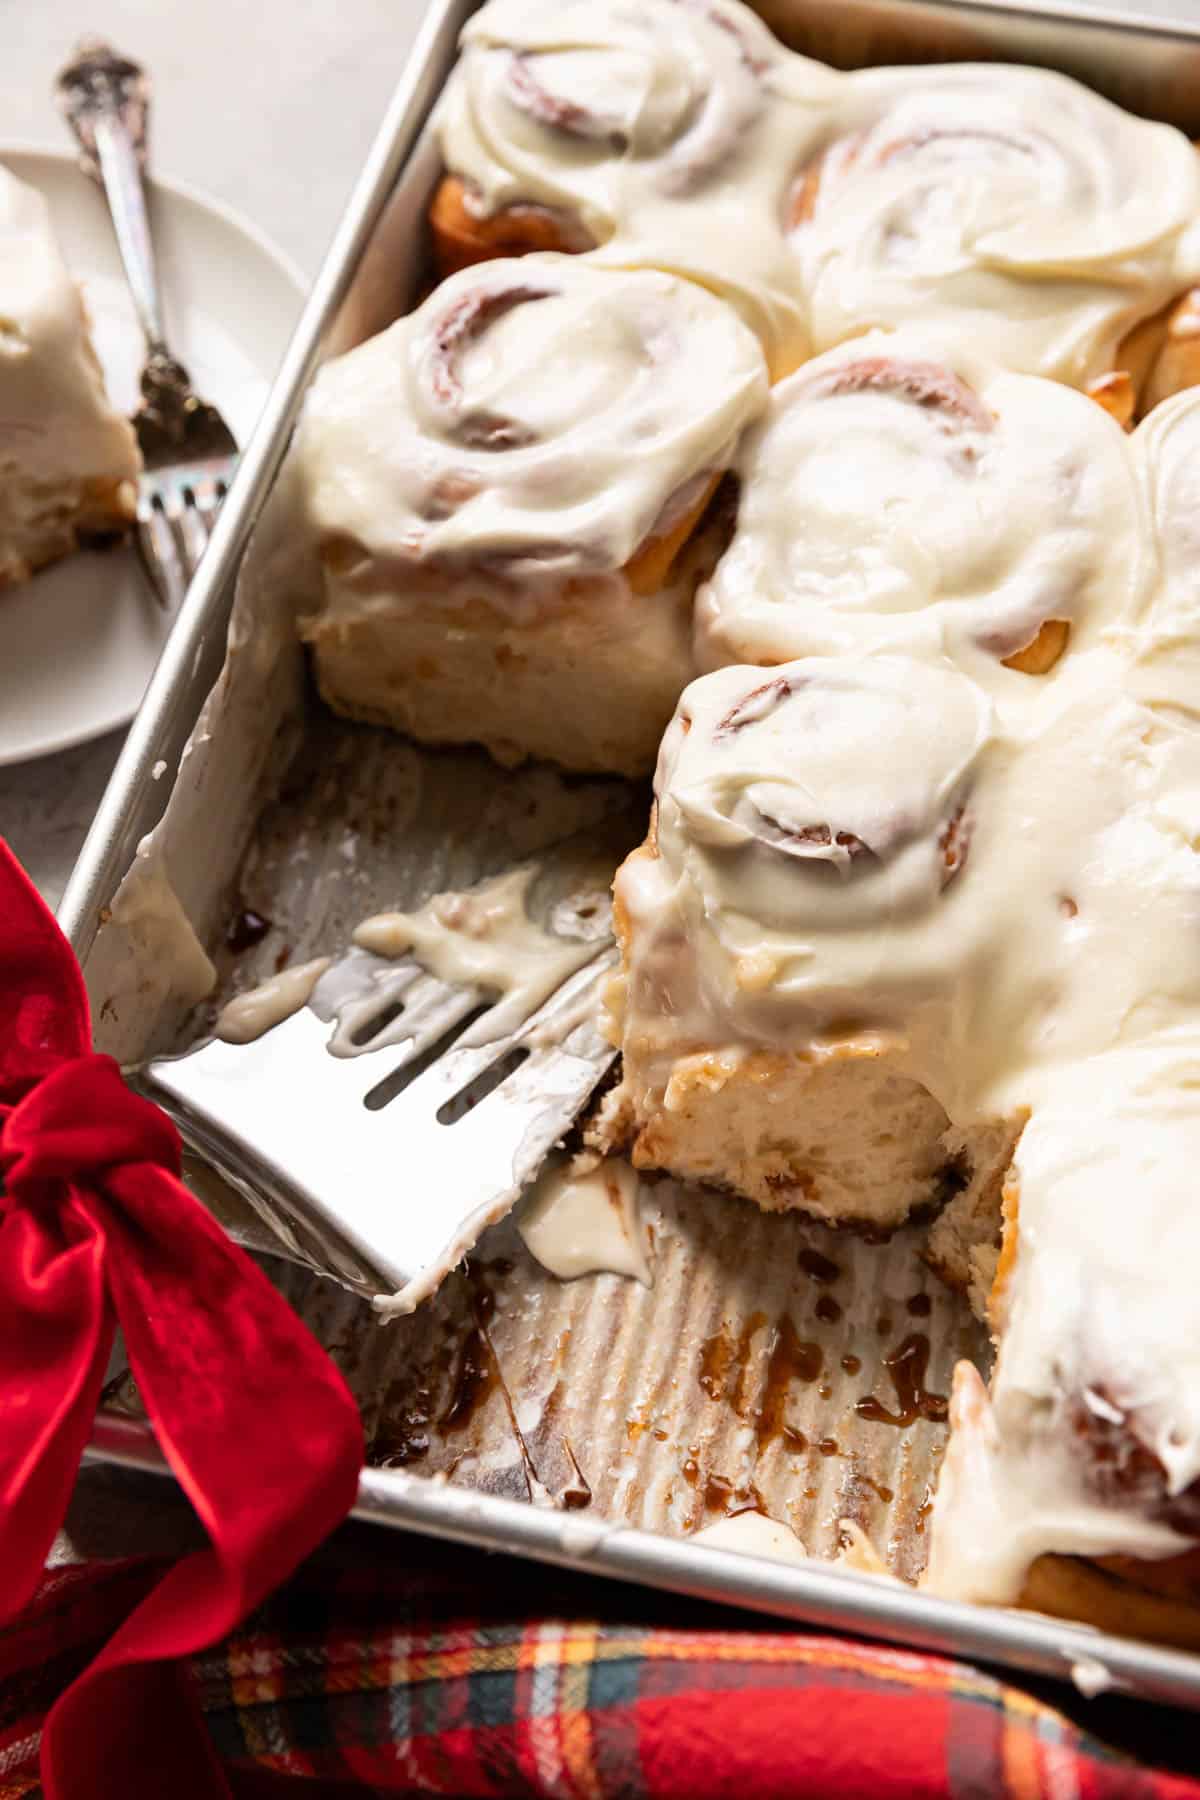
It's up to you when you put the frosting on. But I like to do it right out of the oven so the frosting can seep into the crevices of the cinnamon rolls, coating every inch!
Store in the fridge, since there is cream cheese in the frosting. Best eaten within 5 days. Heat individual cinnamon rolls in the microwave for 15 seconds to re-warm.
The Fluffiest Best Cinnamon Rolls
These are the most delicious, absolute fluffiest cinnamon rolls you'll ever have! They have a pillowy texture with swirls of cinnamon and are topped with cream cheese frosting.
Ingredients
Dough
- 3 ½ c bread flour
- 14 oz whole milk
- 1 egg
- 2 ¼ tsp rapid rise yeast (instant yeast)
- ¼ c cane sugar
- 1 tsp kosher salt
- 4 tbsp salted butter, softened
Filling
- ½ c salted butter, melted
- 1 c dark brown sugar
- 1 tbsp + 1 tsp cinnamon
Frosting
- 8 oz cream cheese
- 4 tbsp salted butter, softened
- 1 ½ c powdered sugar
- Splash of vanilla extract
- Pinch of kosher salt
Instructions
- Step 1. Whisk together ½ cup milk (taken from your original 14 oz milk) with 2 tablespoons of flour (taken from your original 3 ½ cups of flour) in a small pot. Heat over low heat, whisking constantly. Turn the heat up just slightly and continue whisking until it starts to thicken. Consistency should be thick. Let cool for 5 minutes.
- Step 2. In the bowl of a stand mixer add the roux you just made and whisk in the rest of the milk until smooth. Using a dough hook roughly mix together the egg, flour, yeast, sugar, and salt. Add the softened butter and mix until mostly incorporated. Set your mixer on low and knead for 12 minutes (kitchenaid mixer speed 2). Scrape down the sides every 4 minutes. Turn the mixer up one knotch (kitchenaid speed 4) and continue kneading for 6 minutes.
- Step 3. Grease a large bowl with butter or oil. Turn the dough out onto a counter and form into a tight ball. Place the dough in the bowl and cover it with plastic wrap. Set in a warm area of the kitchen and let rise for 45 minutes or once doubled in size (do not let this go over double in size it will effect the texture after baking). Punch the dough down with your fist to release air.
- Step 4. Roll out the dough on a counter. Using a rolling pin to shape into a rectangle. Spread the melted butter. In a small bowl mix the brown sugar and cinnamon together. Spread the cinnamon sugar over the butter. Tightly roll up the dough. Use sewing string (or a knife) to cut 12 evenly sized cinnamon rolls.
- Step 5. Grease one side of a piece of parchment paper with butter. Use it to line a 9x13” metal baking pan. Place the cinnamon rolls evenly spaced in the pan. Cover with plastic wrap and allow to rise for a second time, for 30-40 minutes.
- Step 6. Preheat oven to 350 degrees.
- Step 7. To make the cream cheese frosting beat together the butter and cream cheese for 3 minutes. Beat in the vanilla, pinch of salt and powdered sugar. After the powdered sugar is completely mixed in, turn the speed up and beat for 1-2 minutes to get it fluffy, silky and smooth.
- Step 8. Remove the covering from the pan and bake in the oven for 25 minutes or until the top is golden brown. Cool the cinnamon rolls on your counter for 10 minutes before spreading on the cream cheese frosting. Refrigerate to store.
Notes
*Please see the above post for lots of helpful information, tips and tricks and step by step photos*
Kneading: The dough must knead for as long, maybe more, than instructed. If your dough is still very sticky continue to knead it (speed 4 on a kitchenaid).
Warm Oven Trick: If you don’t have a warm spot in your kitchen for the dough to rise try this trick. Heat your oven to 150 and turn the heat off. Once it doesn't feel too warm place your dough to rise in there with the oven door slightly ajar.
Whole Milk Substitute: 12.6 ounces 2% milk and 1.4 ounces heavy cream.
Recommended Products
As an Amazon Associate and member of other affiliate programs, I earn from qualifying purchases.
Nutrition Information:
Yield: 12 Serving Size: 1Amount Per Serving: Calories: 509Total Fat: 24gSaturated Fat: 14gTrans Fat: 1gUnsaturated Fat: 7gCholesterol: 79mgSodium: 319mgCarbohydrates: 66gFiber: 1gSugar: 36gProtein: 8g
This information comes from online calculators. Although moderncrumb.com attempts to provide accurate nutritional information, these figures are only estimates.




Leave a Reply